

Brief: Is a stool a different way of sitting? Each student was tasked to design and develop a full size, working prototype.
Spring 2019, 14 week project.


Ability to nest together.

18” version


BRIDGING THE GAP.
I became inspired by the notion of movement and traveling. I looked at the connections in urban infrastructures and architecture. How they can unite one place to another.
There was a gravitating beauty in archways and this drove my design process into what a stool could be.

The Gateway Arch, 1965 by Eero Saarinen. Located in St. Louis, Missouri, USA.

Tunnels allow for light to gradient on the surface — this inspired the seat.
PROTOTYPE EXPLORATION.
Aside from exploring ideas on paper, this project allowed me to explore using real materials. Working from small to full scale, provided the opportunity to refine the concept to reality.

Initial 1:4 scale model.

Heat bent PVC pipes, with 1:1 scale orthographic drawing as an underlay.

Observing foam thickness and learning what it needs to be more rigid.

Spray painted the mockup to better match final vision of project and for review.

1:1 scale model with better proportions. Used cardboard backing with faux leather to simulate seating.
REFINED THROUGH TESTING.
The form developed through experiments with ‘bucks’. By bending wood and creating a structure that can be sat on, I was able to finely tune the actual shape that balanced comfort, aesthetics, and function.
This also allowed for people to experience the design concept in real life.
Having a variety of people from different sizes helped strike a balanced design.

Built and iterated upon seating bucks.

Yee-haw! The form allows for users to sit like they’re in a saddle.

Solve Issue: Uneven forming when layering. I learned that I have to use more clamps throughout the curvature, rather than only at the ends.

Solved Issue: When bending wood, wet forming was a method being recommended. However, after trying that method the form did not stay and ended up snapping. After that, I attempted a version without water and it worked perfectly.

A view of saddle seating style.

A view of perch seating style.
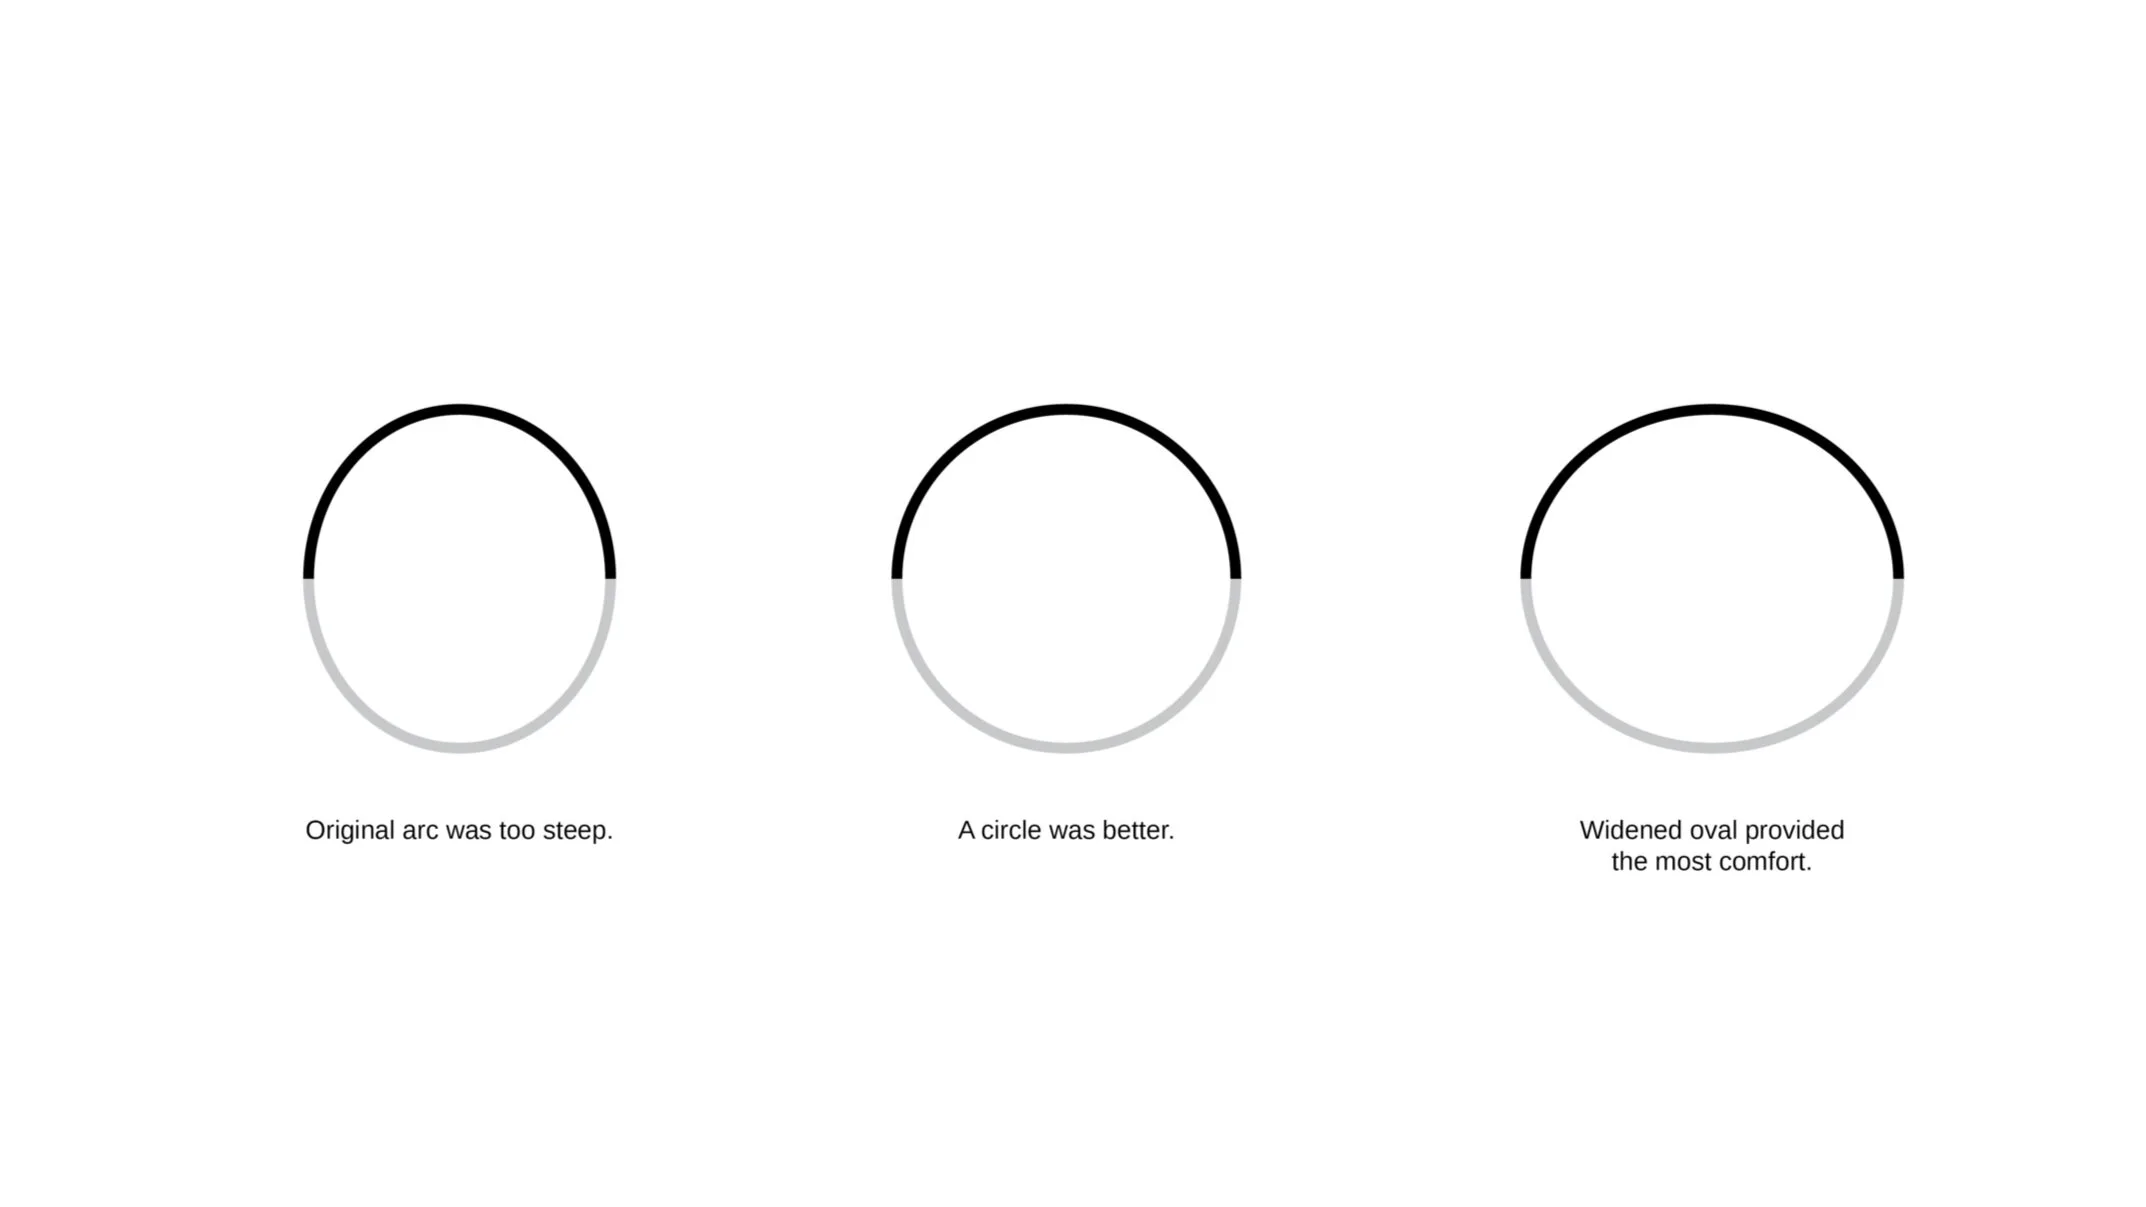
Observation and Adjustment: After talking with volunteers on the seating bucks, it made sense to widen the arc for it to provide the most comfort possible.
TECHNICAL DRAWING.
Made sure to model the design in CAD, with the material specifications I could source from various locations in SoCal. This way, the vendors I needed help with knew exactly what details to keep in mind for the project.

FINAL PROTOTYPE BUILD.
Here, I had to prioritize the arc frame and work with the real materials. I used this time to make samples for vendors to look at for reference, and tested between material sizes which led towards final detail refinements.

Manual rolling steel sheets.

Practiced with 16 gauge sheet metal, ultimately decided to go with 12 gauge for extra structure.

Metal parts, pre-welding.

Final in-person specification check up. Used cardboard and wooden dowels to adjust proportions in person. Widened the seat portion to accommodate for more people.
Happy Accident: Originally, I intended to only make the taller version of the stool. However, as the steel tubes came in 10 feet long — I ended up using the excess material to form a smaller variant. This worked out great as I did not have to waste the material and it did not add to the cost of the project.
WOOD FORMING.
This process was extremely fun and learned a ton. It was necessary as I wanted to upholster the seat with fabric + padding. Each attempt took about 24 hours to cure. After each attempt, I found what I needed to do to make it better and implemented it into the process.

The first try on this one, I bathed the wood but it snapped in half after curing. Then I decided to make it without water and it held without any springback.

Originally bent the wood and clamped at the ends. I learned that this only had a 50% success rate.

Revision two, I began clamping from the center and went outwards. This way, it ensured flushed forming of the wood to the steel all the way through.

I masked the frame to prevent any wood glue from sticking on metal.

Final bent wood pieces, sanded the edges and added a radius to the corners. This is the foundation for the upholstery stack up.
UPHOLSTERED.
Due to my limited personal budget and with time winding down on the deadline… I ended up learning how to upholster the seating. This was a rewarding experience, as this was the final piece to be made for the project.

Cut the 1/4” foam to match the wood form. Used spray glue to make sure it would not shift in place.

After figuring out the size needed, I marked out the specification on real leather.

Prepping the materials per seat.

Stapling the fabric on all four sides, before trimming.

End result fitted nicely onto metal frame.
POWER COATED.
Found a vendor about 1 hour away from Pasadena who does powder coating and brought the stools to them for final paint finish. Looked at their catalog, selected the options and was quoted a price for all the stools.

The steel parts in raw form. I had to patch the weld marks on the tubes of the tall designs with Hi-Temp JB Weld. It sanded easily and came out smooth.

Hanging out — preparing the stools for a powder coat finish.

Eric from Express Coating spraying down the first coat of matte black.

FINAL PROTOTYPES.
Ultimately finished the project with four different units and two size variants. I originally intended on making them all have the same finishes, but opted to diversify and contrast finishes for the final. By doing this, I learned a lot more about the complexities in fabrics, paint colors / finishes, and how thickness can alter the edge details of a product.

Satin black metal frame, with black leather upholstery.
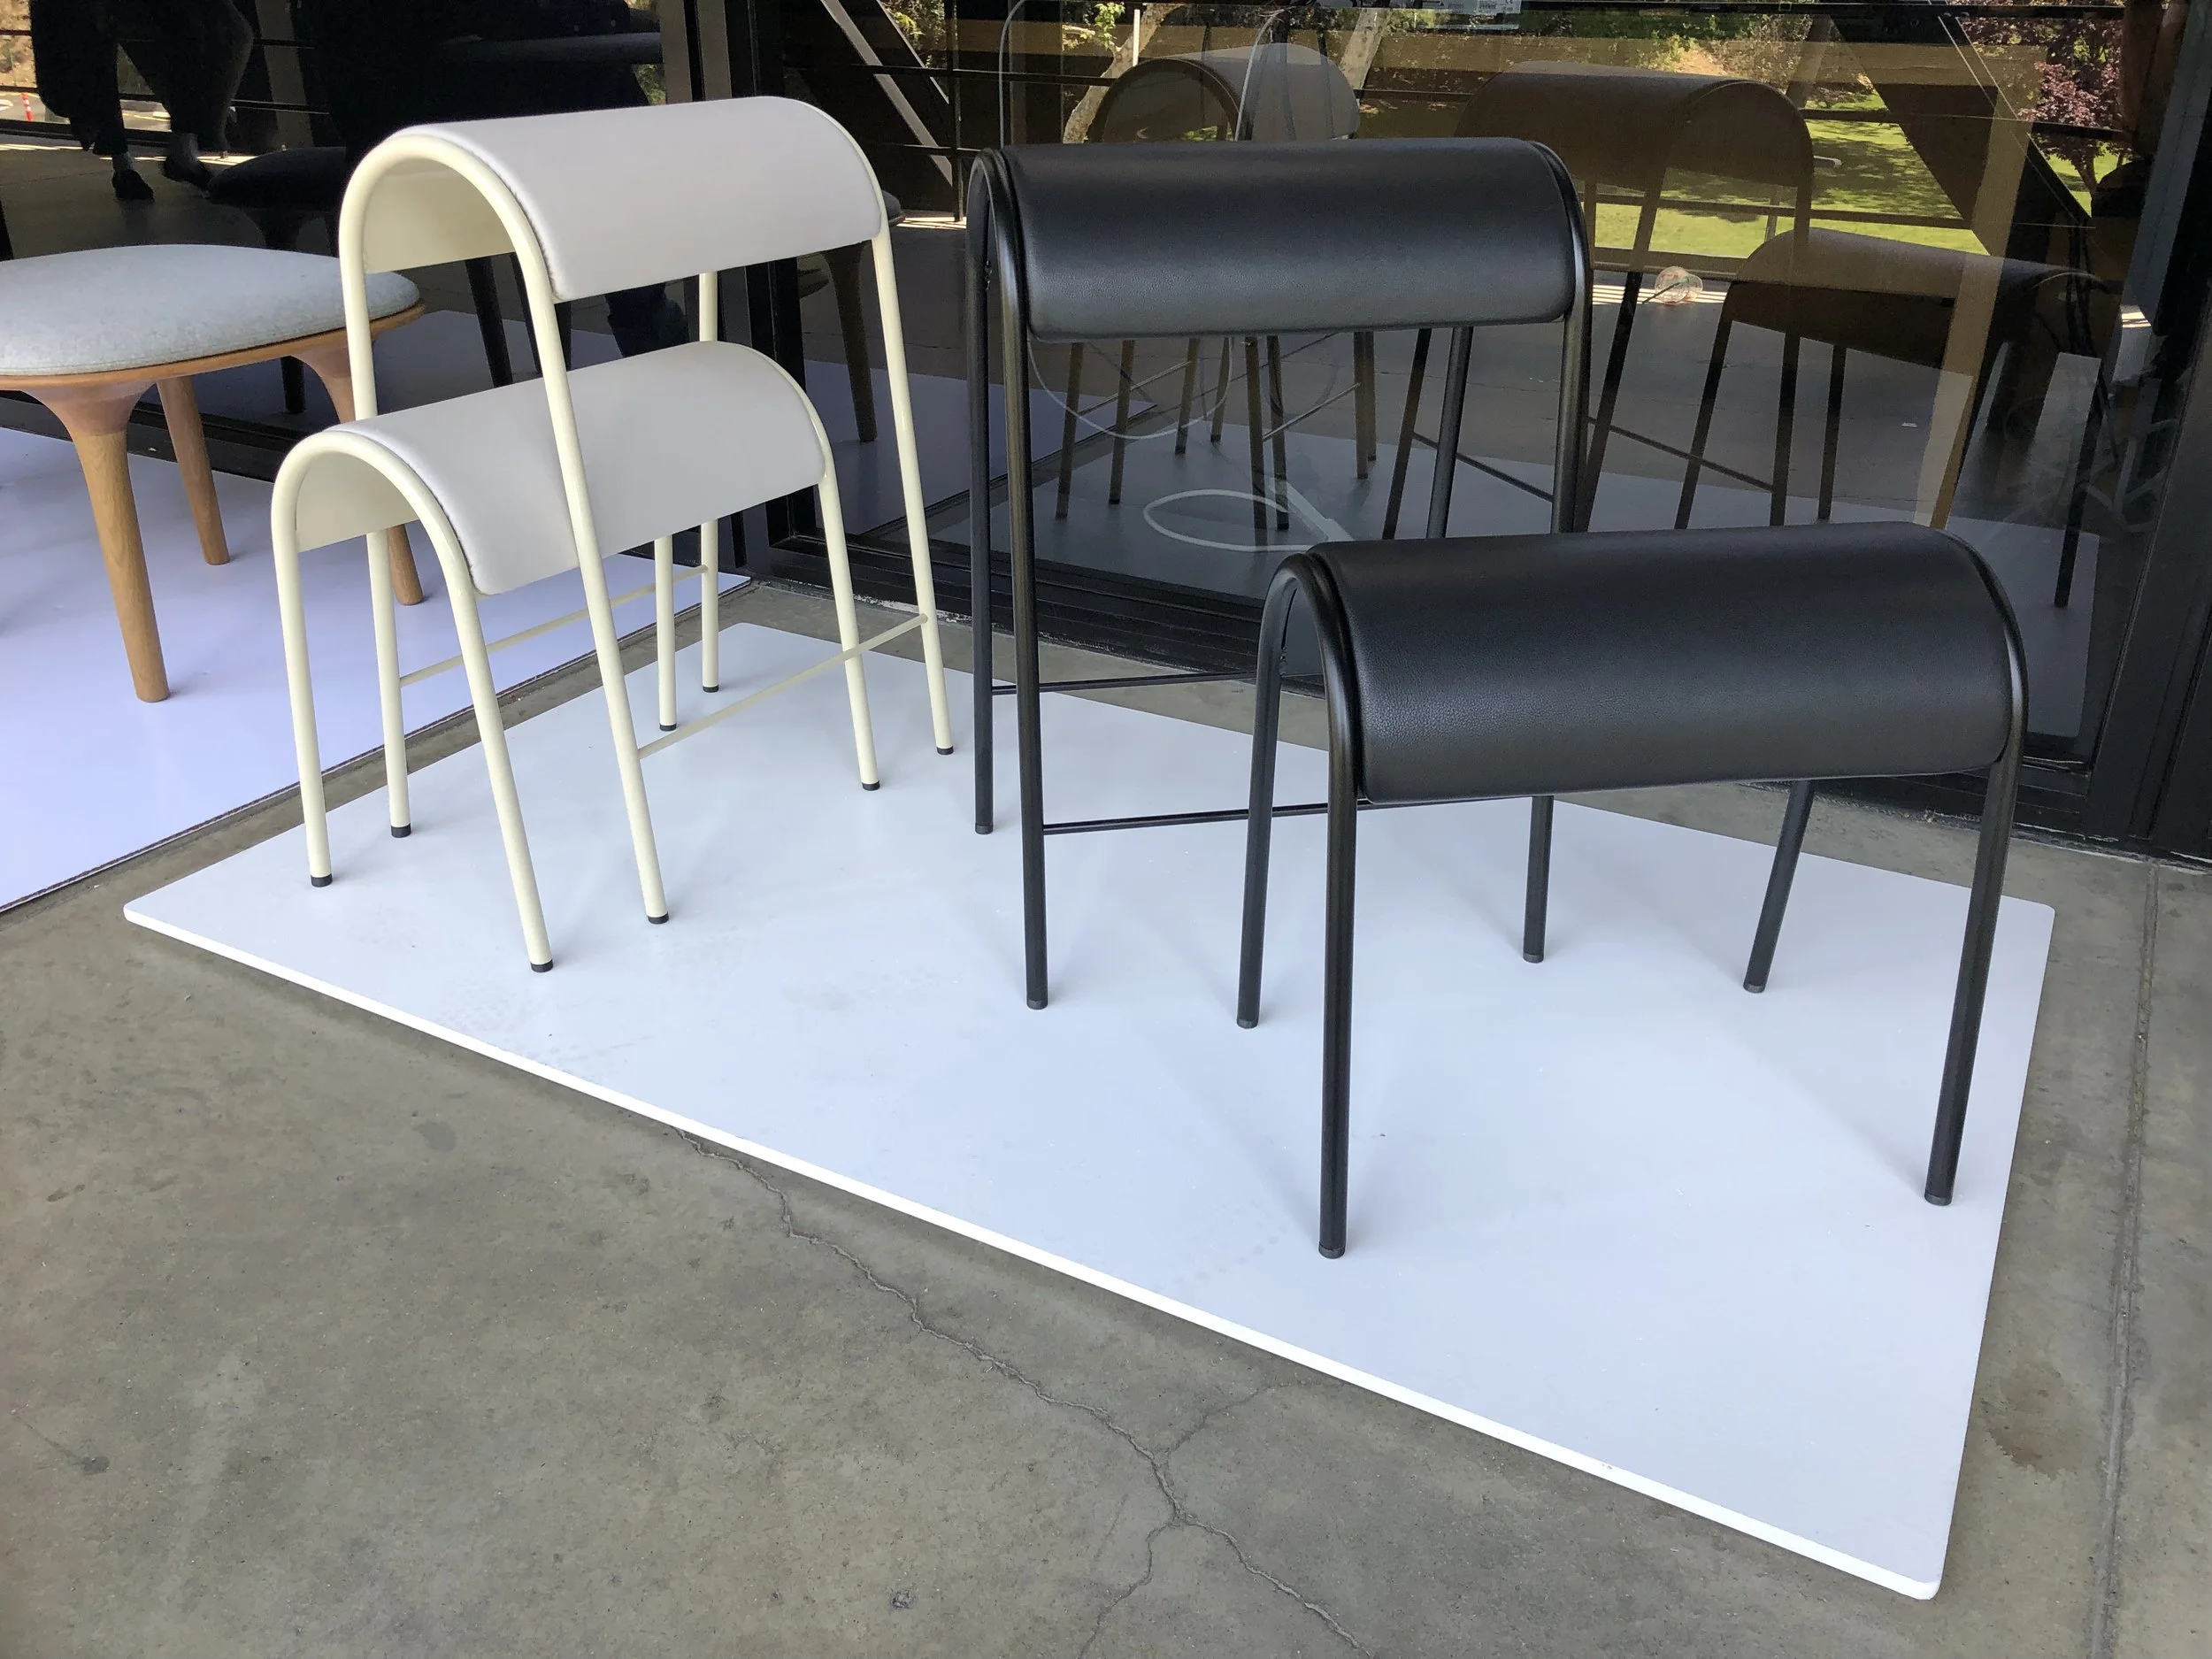
Off-white with outdoor rated fabric alongside the black variant.

Showcased at Grad Show — family, friends and guests got to check out the stools.

THANK YOU.